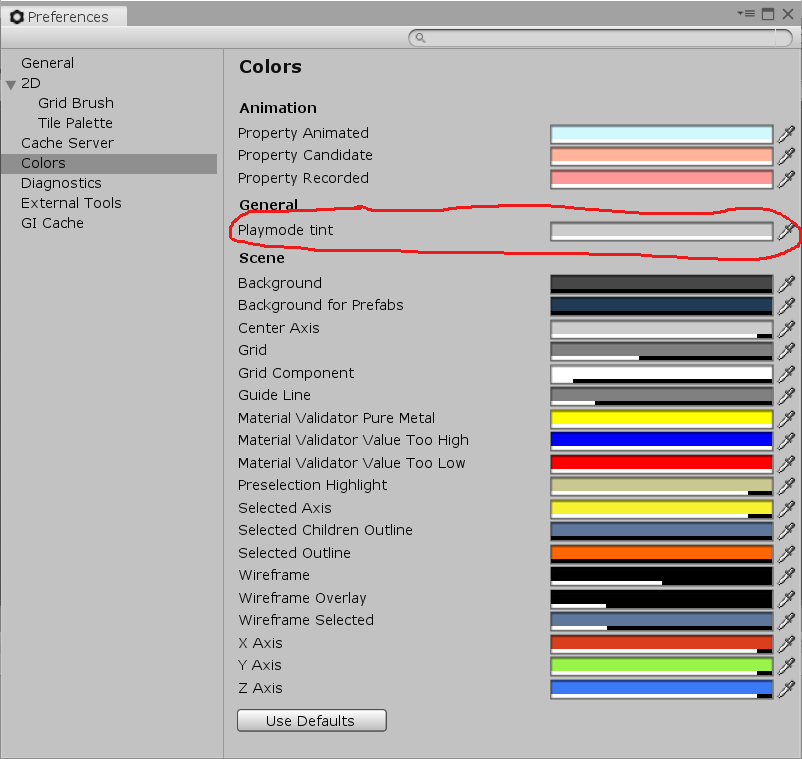
|
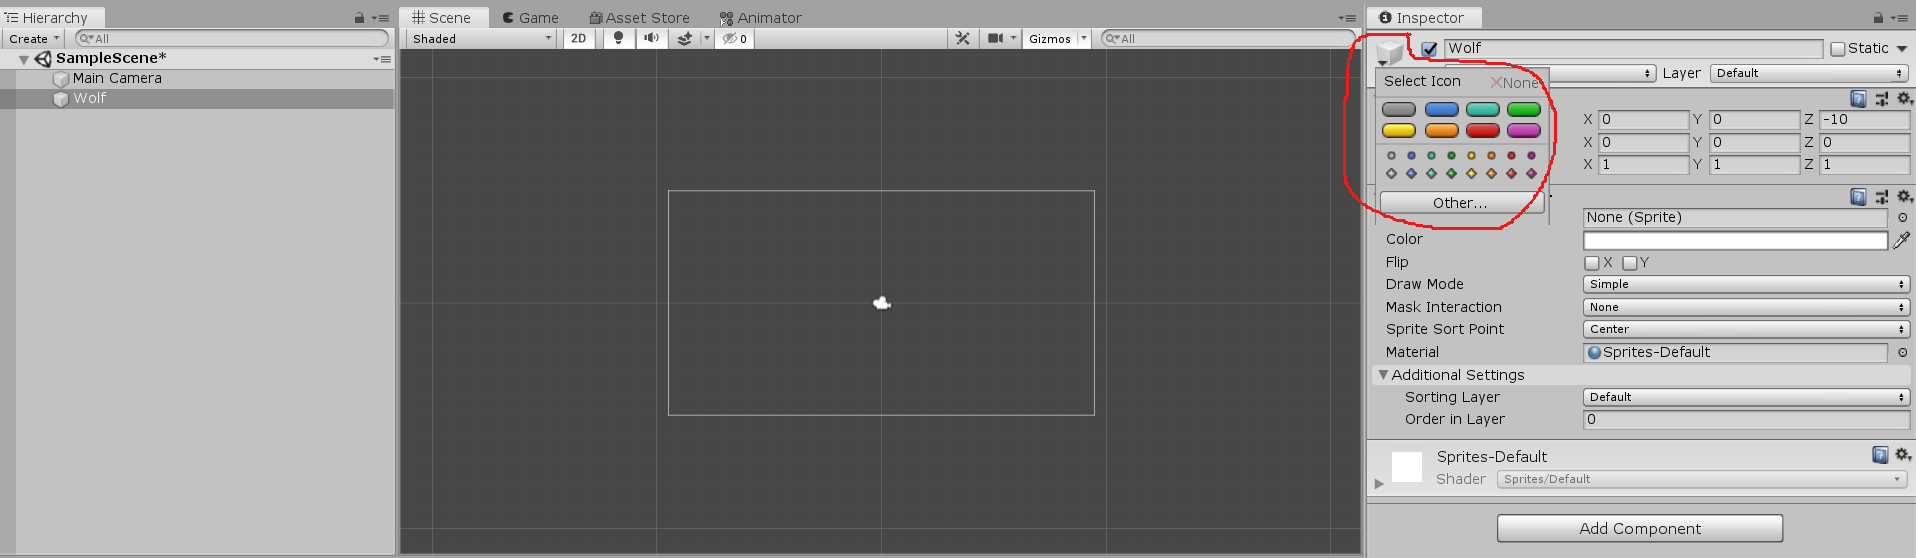
Move Tool
Drag an arrow to move the GameObject up/down left/right.Snap to Increment Hold down while dragging the Move Tool handles. Snap Increment Settings
|
Rotate Tool
Drag either outside circle to rotate the object in the scene plane.Drag either of the horizontal/vertical ‘crosshairs’ to rotate in space.
|
Rect Tool
This tool combines moving/scaling/rotating.Move: Drag inside the rectangle to move. Scale: Drag any corner/border to scale. (There's no easy way to scale proportionally with this tool.) Rotate: Position your cursor just beyond a corner. The cursor changes to a rotation icon; drag to rotate.
|
||||||
|
Move,
Rotate,
Scale and
Rect
all alter the Transform Component of a GameObject,
hence are referred to as
Transform Tools. (Take a look at the Inspector Window as you play around!) |
||||||||
|
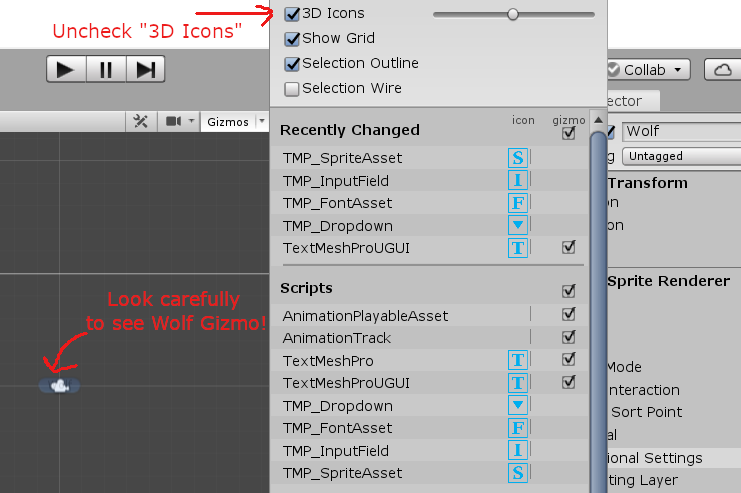
Hand Tool
In , click-drag to move the camera around.This allows you to inspect different parts of a big scene. There are no Hand Tool handles. In a 2D project, you can temporarily switch to the Hand Tool at any time by holding down the key. Super convenient! You can also use arrow keys (up/down/left-right) to move around the scene. Simultaneously hold down the Shift key to move faster.
|
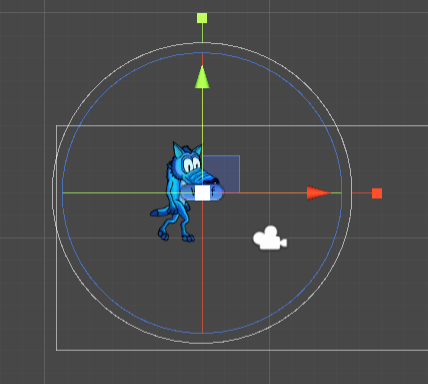
Move, Rotate or Scale selected objects
This tool is a convenient combination of the Move, Rotate, and Scale tools.The handles work the same as the individual tools. The Move and Scale handles overlap: inner parts will Move; outer parts (past the arrows) will Scale.
|
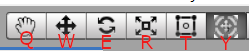
QWERTY Keyboard Shortcuts
From almost anywhere in the Unity Editor,pressing ‘q’, ‘w’, ‘e’, ‘r’, ‘t’ or ‘y’ gives you the tools indicated below:
|
|
Keep Your Files Organized
Get in the habit of good file organization.Create a top-level folder at . Inside this new folder, put two subfolders: and . See (0) at right. As you'll see shortly:
Locate the Sequence of Images
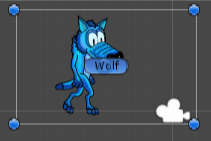
You may need to look around.to Convey the Impression of Motion You can see where I located mine in (1) at right. I'll refer to this set of images as the Animation Clip. Note: There are ways other than what I show below to apply animation(s) to Wolf. |
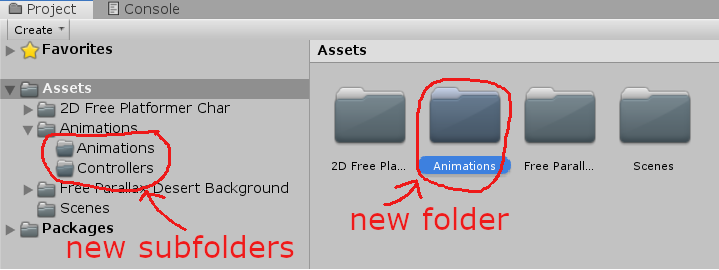 (0) Develop good file organization habits. In the Project area, use . 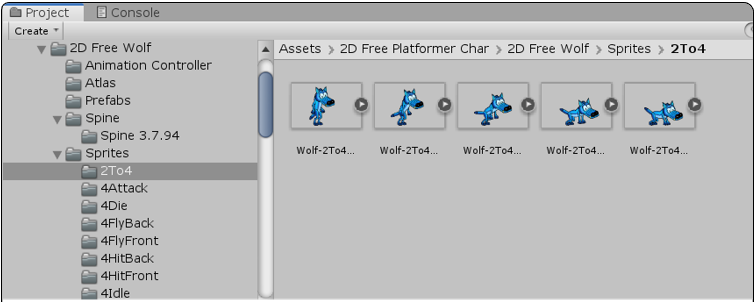 (1) the sequence of images to convey moving from 2 feet to 4 feet; call this the Animation Clip |
|
Select All Images in the Animation Clip
|
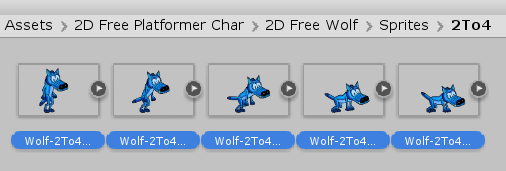 (2) select all images in the Animation Clip |
|
Drag the Selected Animation Clip onto Wolf
After dragging the Animation Clip onto Wolf in ,
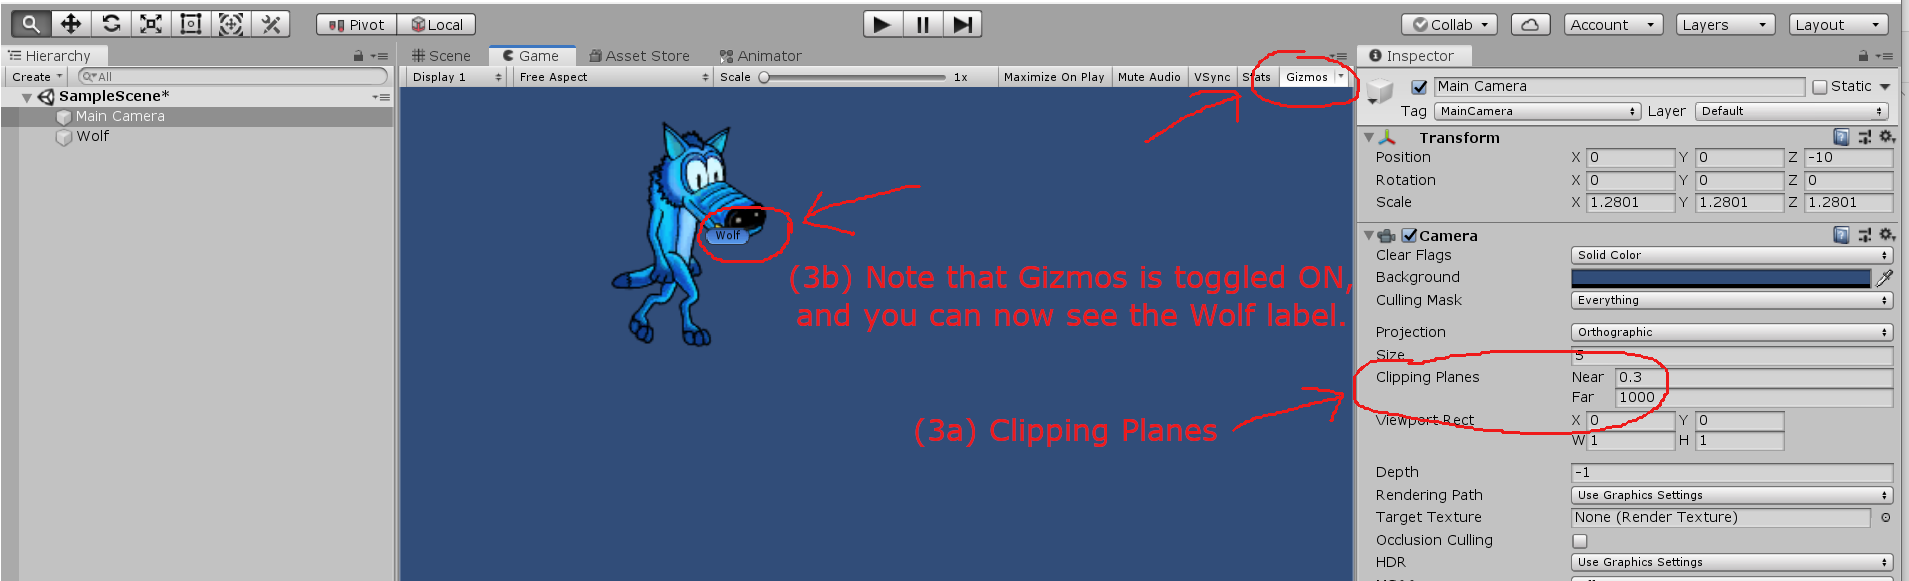
you're prompted to create a name for the animation.Keep the extension ‘.anim’, but change the name to something meaningful for your animation. I named mine: 2To4.anim Change the file location to your folder. Unity does several things automatically for you, as shown in (3abcd) at right:
The new name (and new location) is automatically updated in the field. |
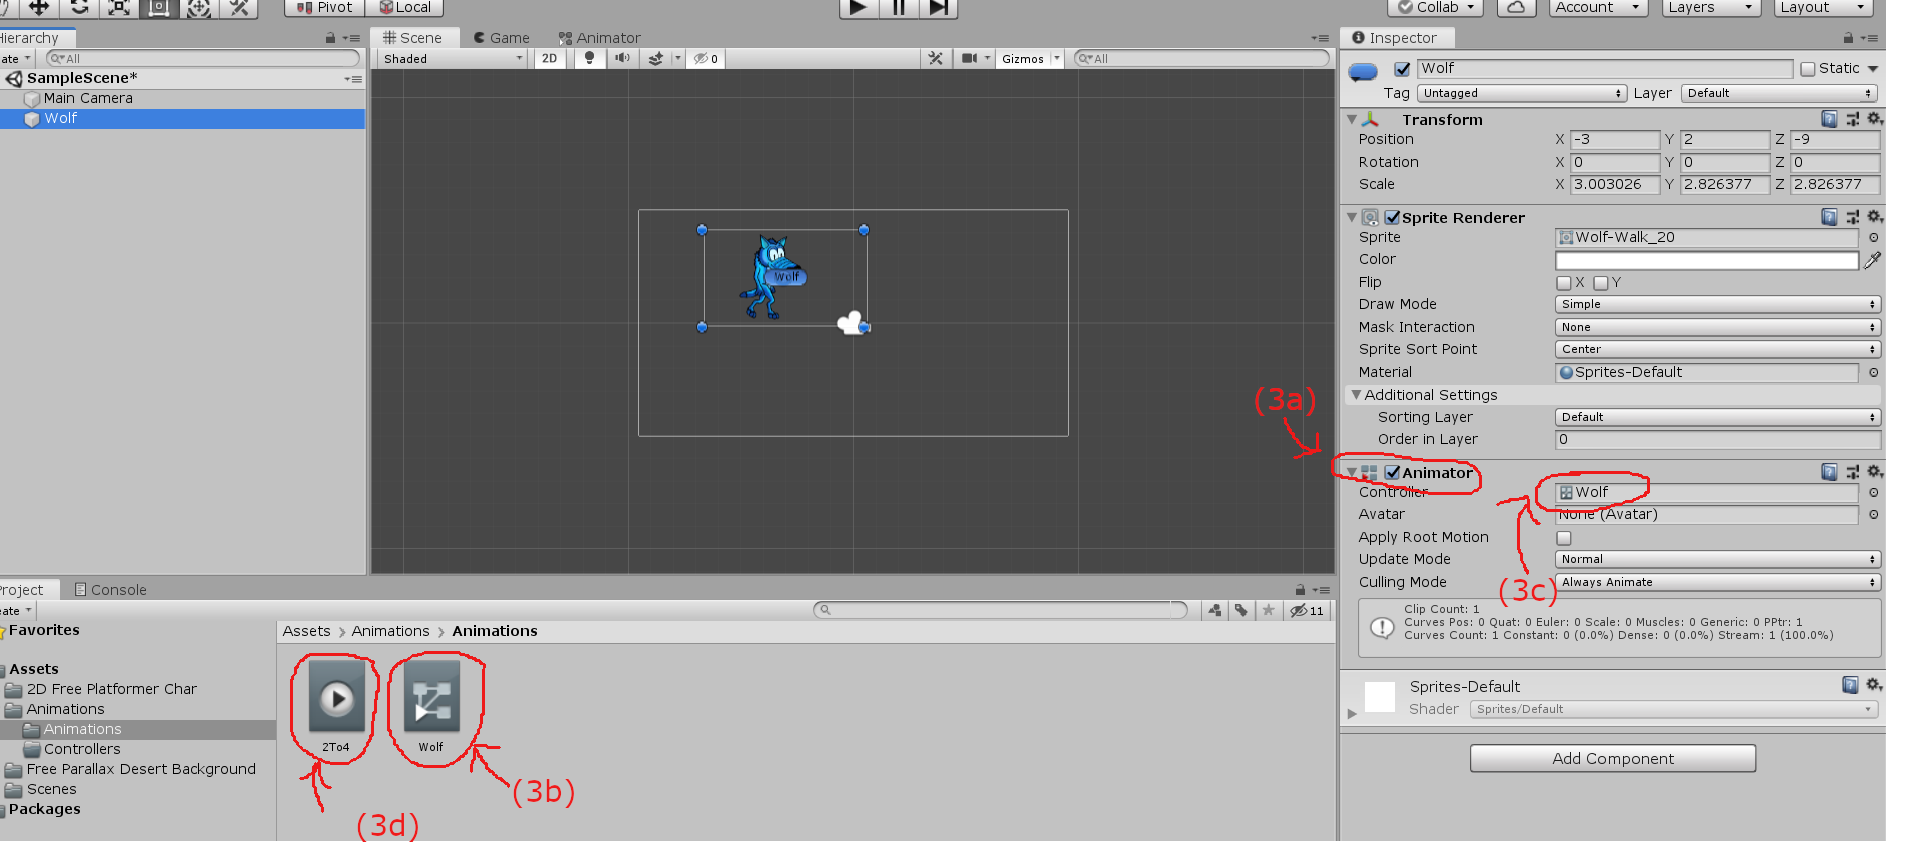 (3) drag the selected Animation Clip onto Wolf; several things happen automatically (discussed at left) 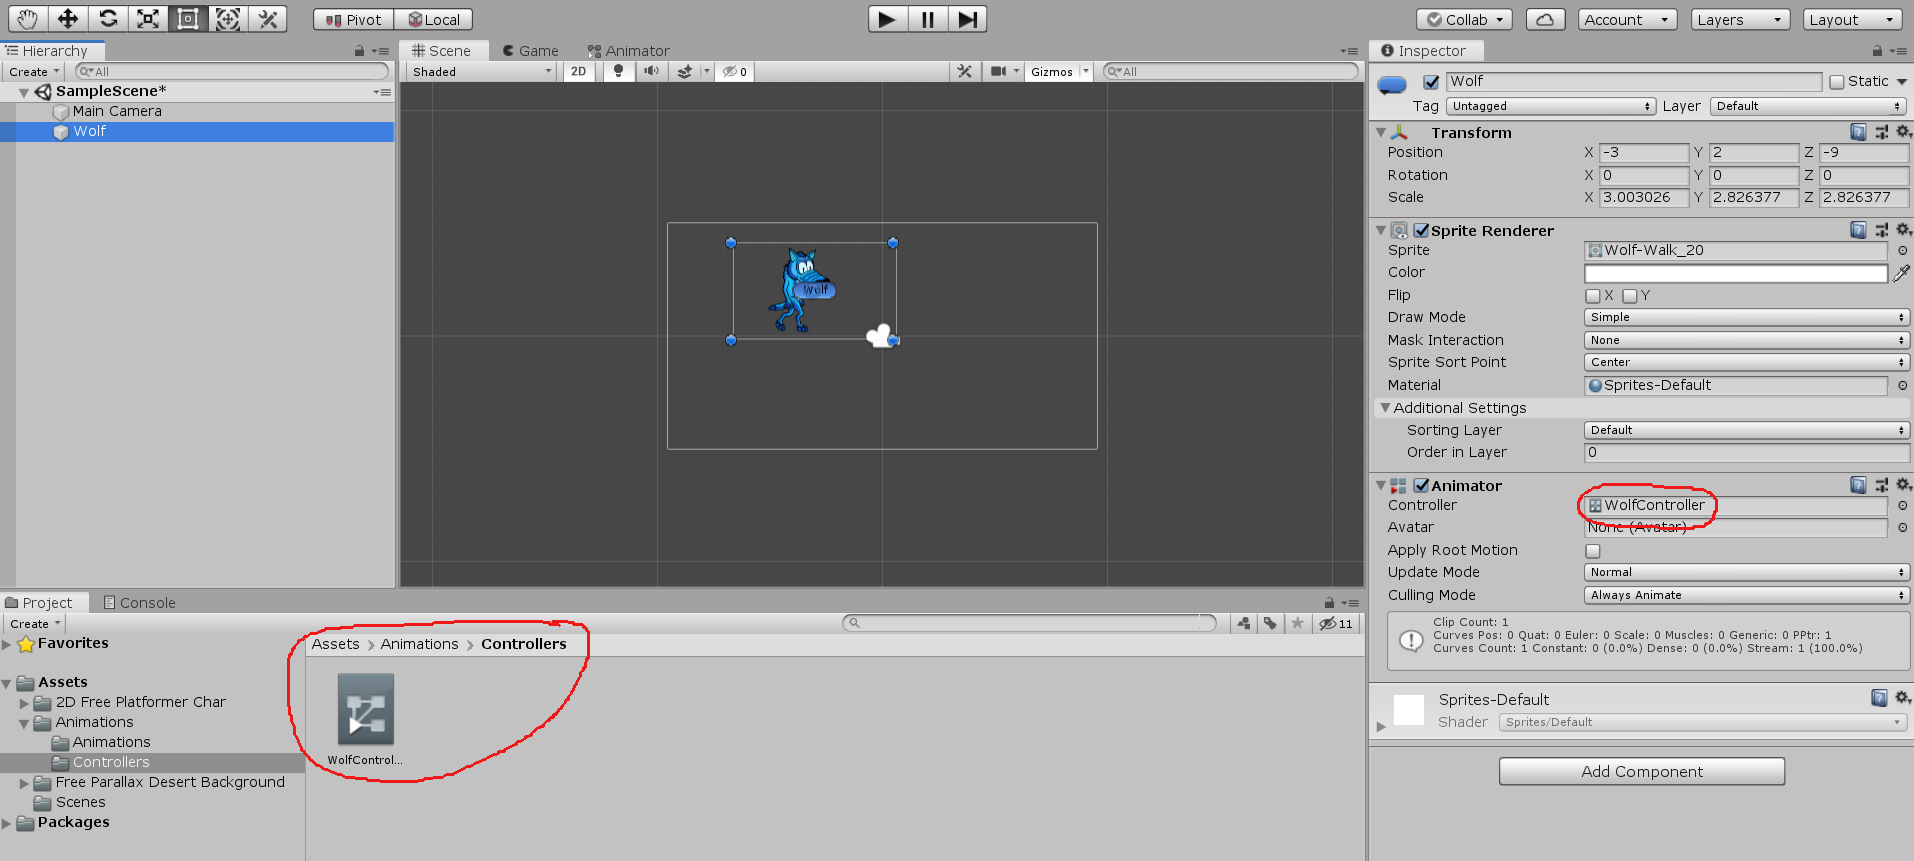 (3e) Drag into ; rename it to . The new name (and new location) is automatically updated in the field. |
|
Play your game! See Wolf move!
You'll see Wolf going from 2 feet to 4 feet (over and over and over again).
Undoing the Animation
If you want to temporarily suspend animation on a GameObject, just uncheck its Component.If you decide you no longer want an animation on Wolf, you can completely undo what you did as follows:
|
 (4) removing the Animator Component (if you no longer want an animation on Wolf) |
|
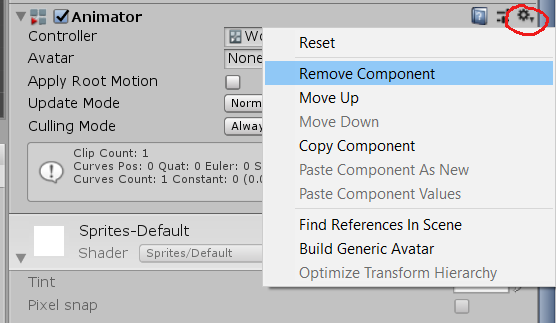
Drag More Animation Clips to Wolf
Find (at least) two more animations that (together with the first) naturally create a ‘loop’.For me, it's natural to:
As before, drag the new Animation Clips onto Wolf; relocate/rename files as needed. You should now have (at least three) animation files. No new controller is created: each animated GameObject has a single Animator Controller. See (5) at right. No new Animator Component is created: each animated GameObject has a single Animator Component. However, a GameObject can use many animation files. See (5) at right. An information box in the Animator Component indicates that three Animation Clips have been added to Wolf. See (6) at right.
Only the First Animation Clip is Showing
Now, several Animation Clips have been added to Wolf.when Playing the Game If you play the game, however, you only see the first one. That situation is about to be fixed! |
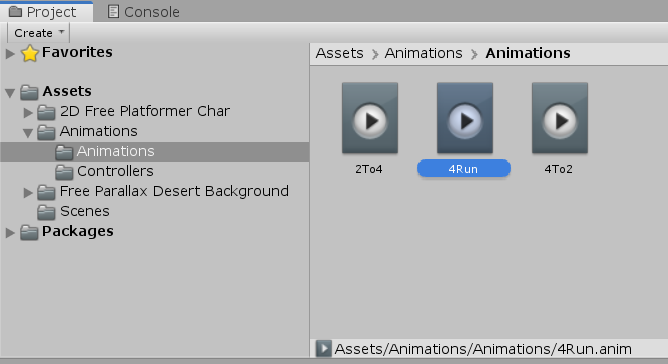 (5) After a first Animation Clip is dragged onto Wolf, any subsequent clip generates only a new animation file (no new controller file). Every animated GameObject has a single Animator Controller and a single Animator Component, but can use many animation files.  (6) ‘Clip Count: 3’ reflects that three Animation Clips have been added to Wolf (For me, this information was only updated after playing the game.) |
|
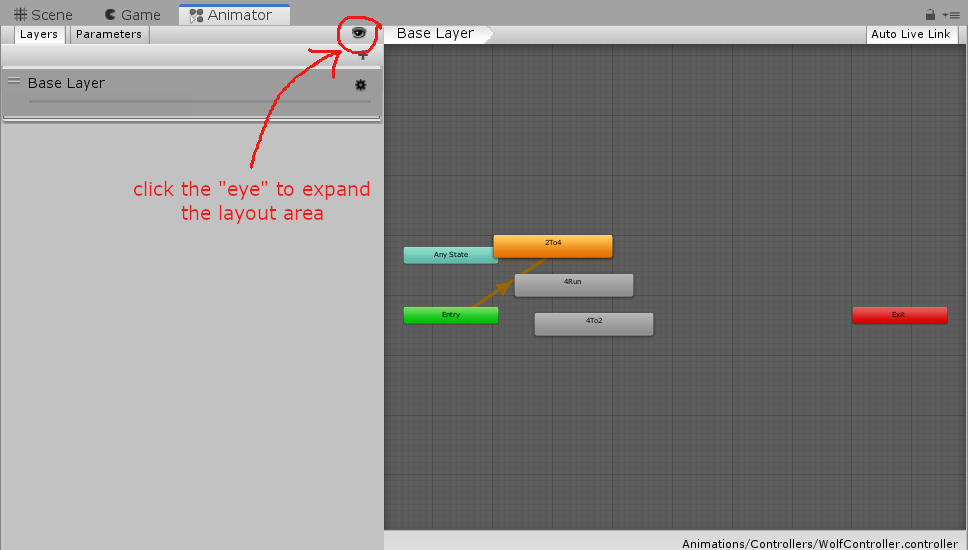
Animator Window
Double-click .The will open. See (1) at right. The allows you to create, view and modify Animator Controller assets. My initial view in the had stuff hidden. Click in the and press the ‘a’ key (for All) to see everything. See (2) at right. Layout Area of the Animator Window
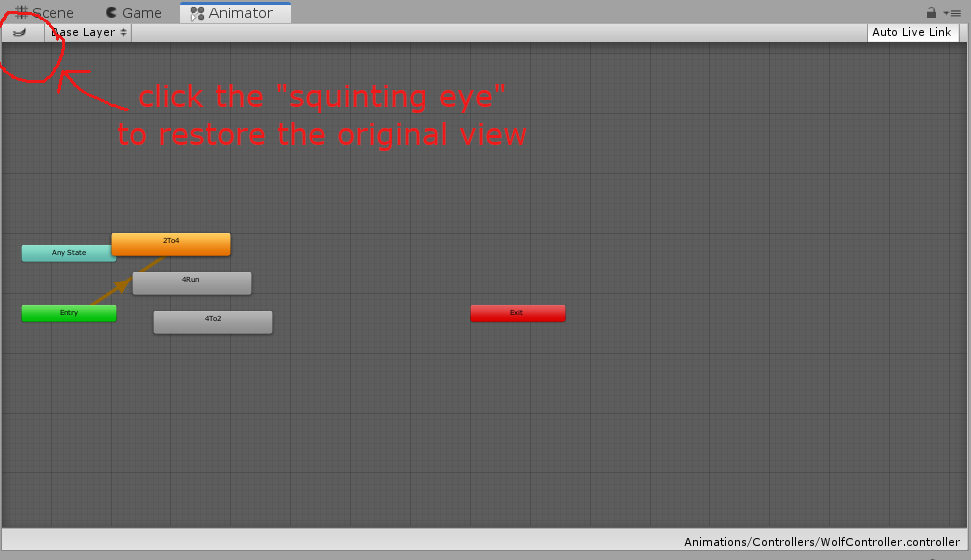
The main section with the dark grey grid is the Layout Area.The Layout Area is used to create, arrange and connect states. You can click the ‘eye’ (see (2)) to expand the Layout Area. Then, click the ‘squinting eye’ (see (3)) to restore the original view. In the Layout Area, you see a graph diagram:
|
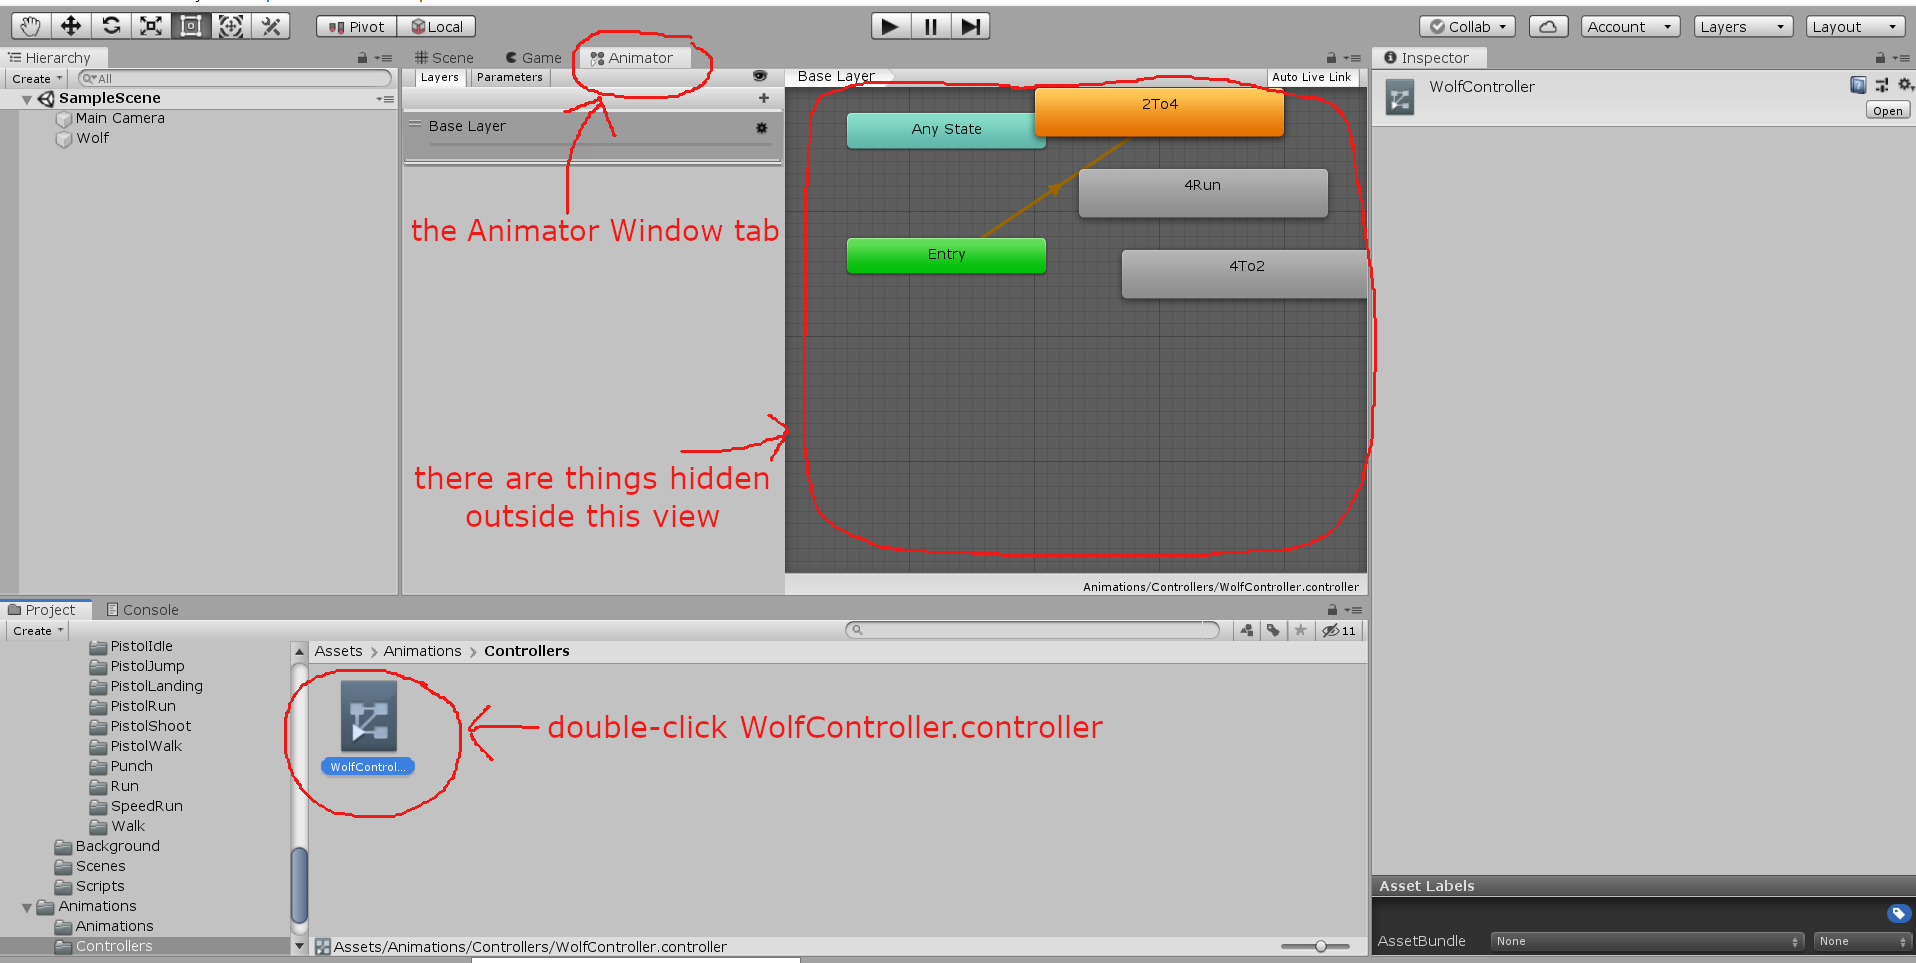 (1) After double-clicking , the opens. However, there are things hidden outside this view. Click in the and press the ‘a’ key (for ‘all’) to see everything.
|
|
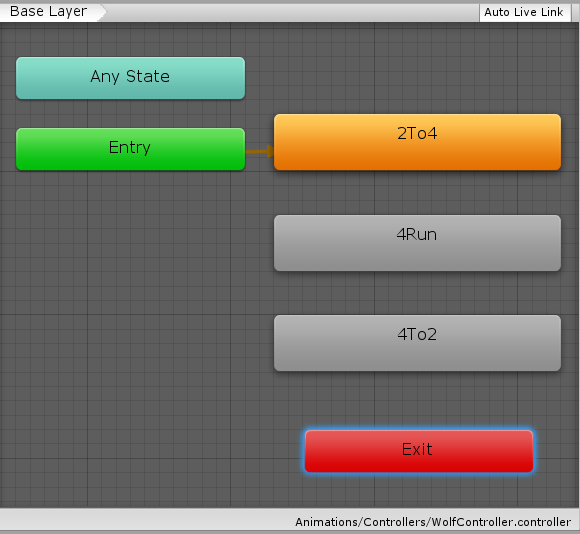
Rearrange the Layout Area
Click and drag nodes to make the Layout Area more meaningful to you.The visual layout is for your benefit only—it changes nothing in the game. Arrange your nodes to look something like (4) at right. Create New Transitions
To make a new transition from node A to node B:
(Note: There is a transition from back to .) Play the game again to see your loop of Animation Clips! |
|
|
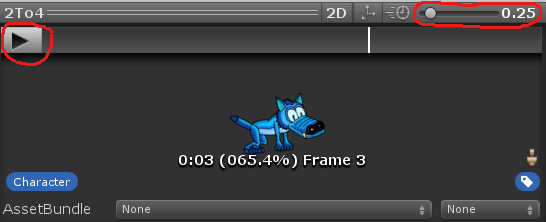
Unity's default settings for my states and transitions worked okay, but not great. A few tweaks (keep reading!) made the animation better. I wanted Wolf to bend down () and get back up () a bit slower. I also wanted Wolf to run () faster. In the , click on a node to adjust a state. See (1) at right. Speed has a default value of $\,1\,.$ Change this value to play the associated Animation Clip faster/slower. For example:
|
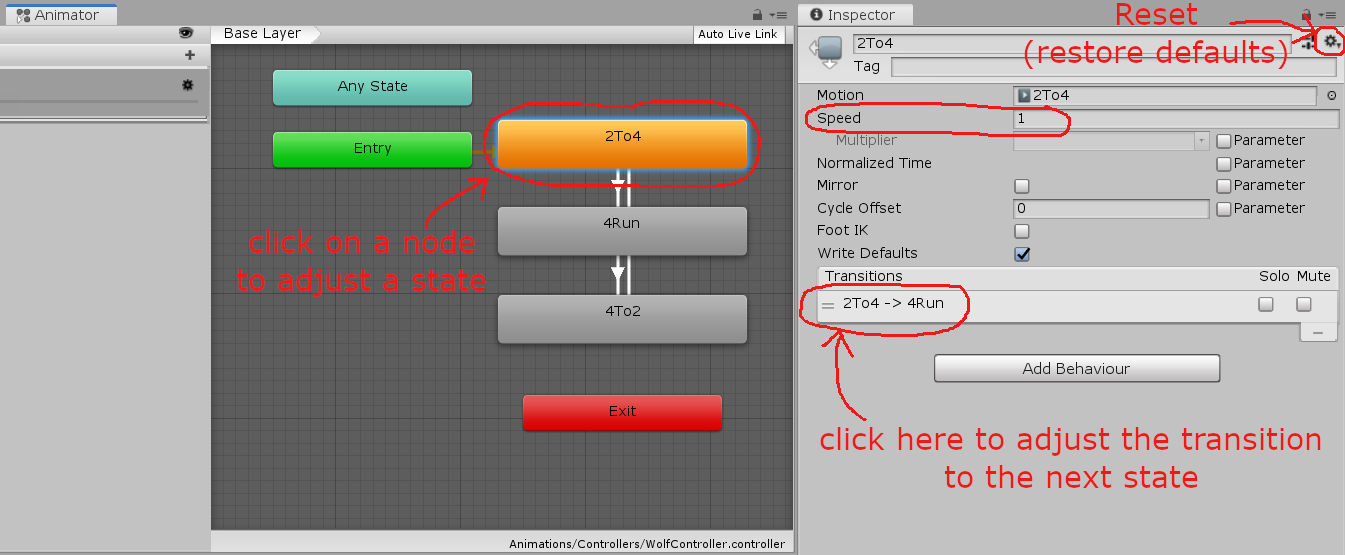 (1) Click on a node to adjust a state. has a default value of $\,1\,.$ greater than $\,1\,$ makes it faster. (strictly) between $\,0\,$ and $\,1\,$ makes it slower. (restore defaults) using the dropdown in the upper right. Click where indicated to adjust the transition to the next state. |
|
(2a) To adjust a transition, you can click an arrow in the Layout Area. Or, use the method indicated in (1) at right. Depending upon the Animation Clips being joined, you may want one to ‘merge’ into the next, rather than completely ending one and then abruptly starting the next. Or, you may want a clip to play more than once before going on to the next. You can do all this (and more). For a particular transition/arrow, I use this terminology:
It will just keep playing over and over again. Try it! Suppose is checked, and is unchecked. (Note: You may need to expand the menu.) Then:
Wolf is now moving, but it is only moving in place. Wolf isn't changing its position on the screen. Getting Wolf to change position is an opportunity to enter the world of scripting! |
(2a) You can click an arrow to adjust a transition. (2b) (when checked) is used to control how much of the current Animation Clip is played before ‘merging’ with the next. (2c) Drag the indicated marker to preview the animation. (restore defaults) using the dropdown in the upper right. |