homepage: Dr. Carol JVF Burns

See the Sewing/Crafts section of my main Table of Contents for other sewing projects!

ROLL-UP WRENCH HOLDER

Ray's wrenches were out of control!
He keeps them in the car, and frequently finds them scattered all over the place.
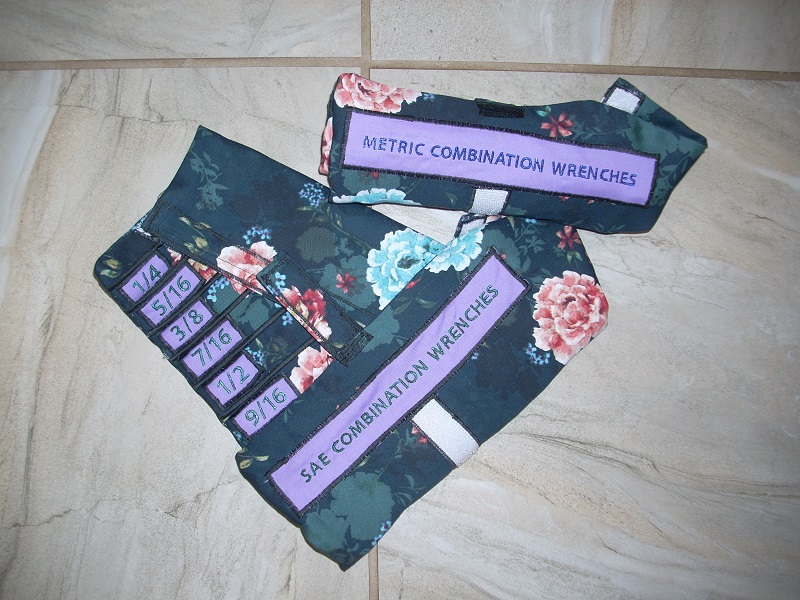
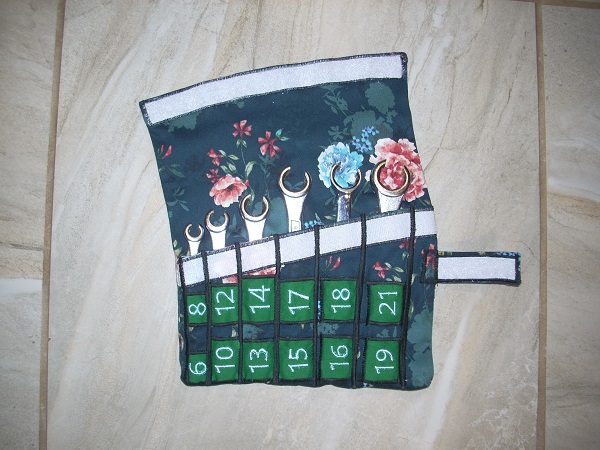
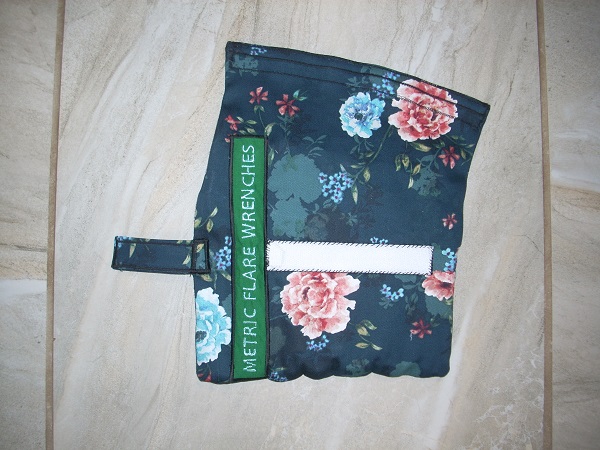
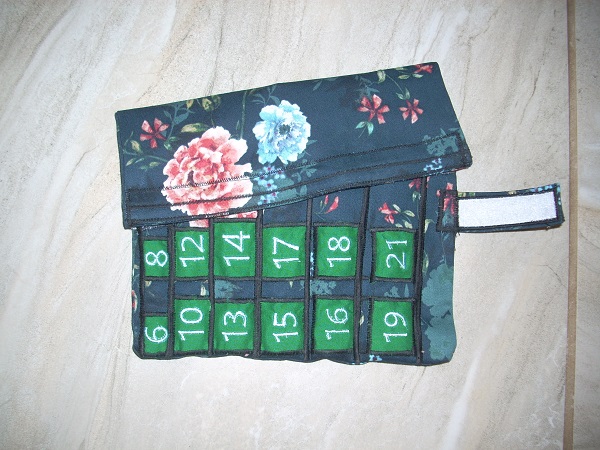
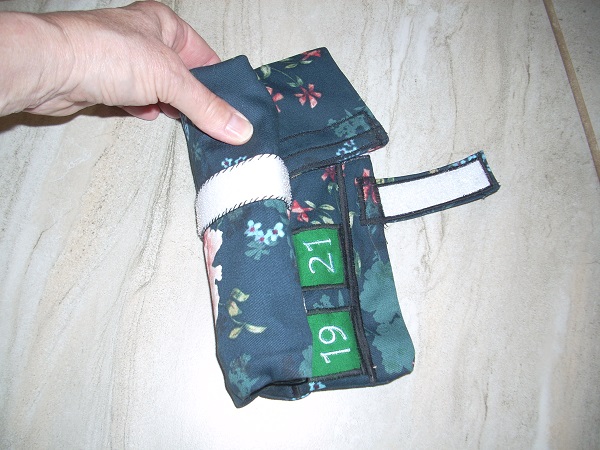
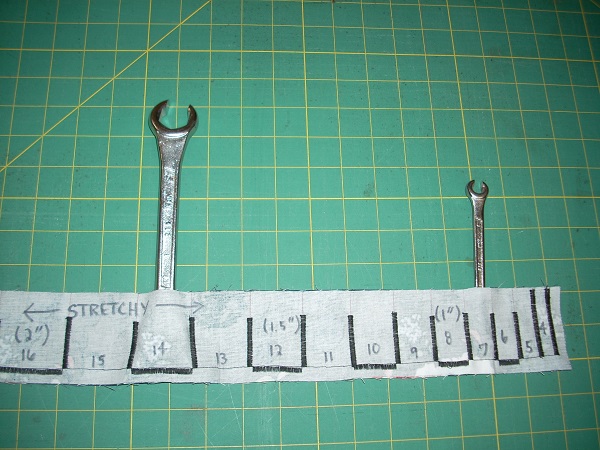
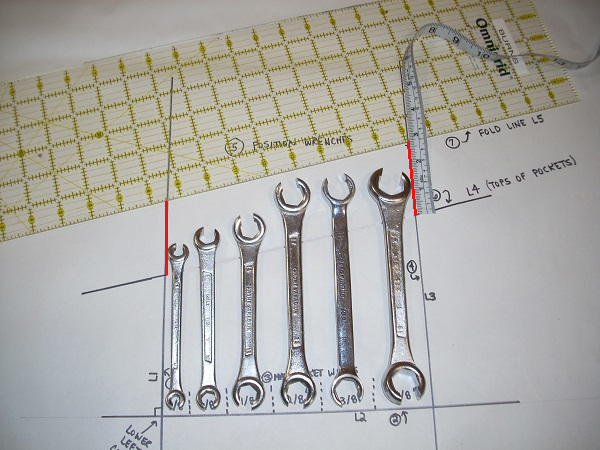
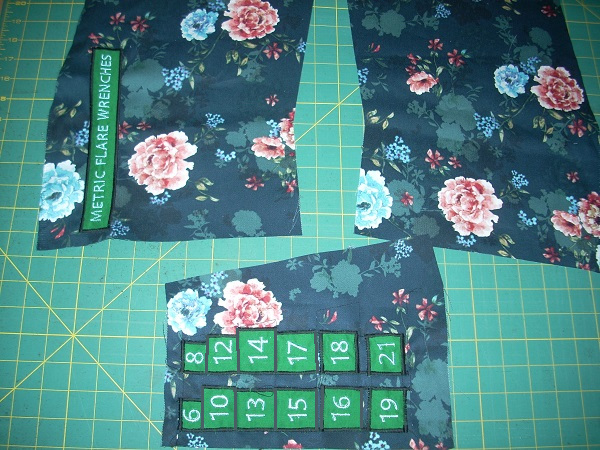
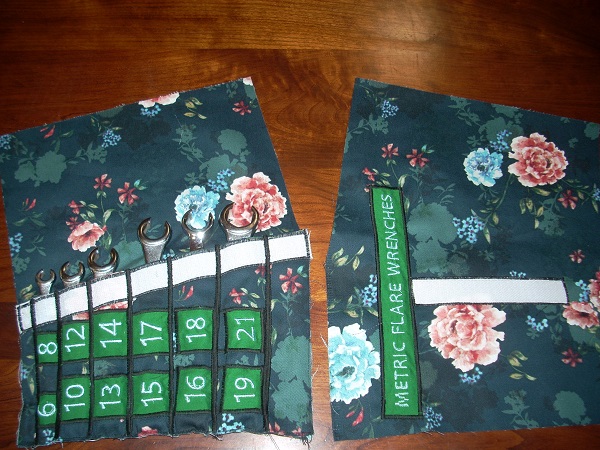
Our criteria for these wrench holders:
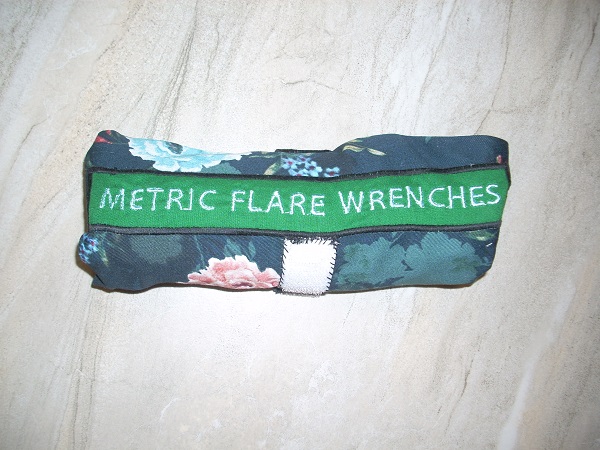
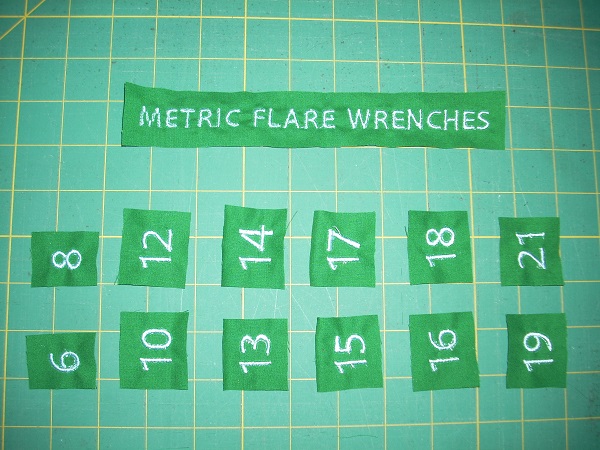
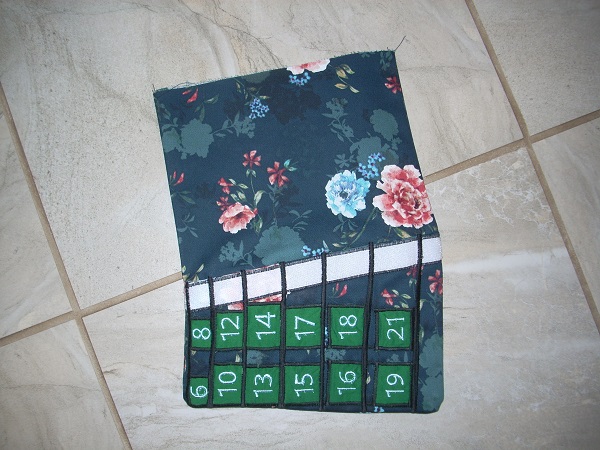
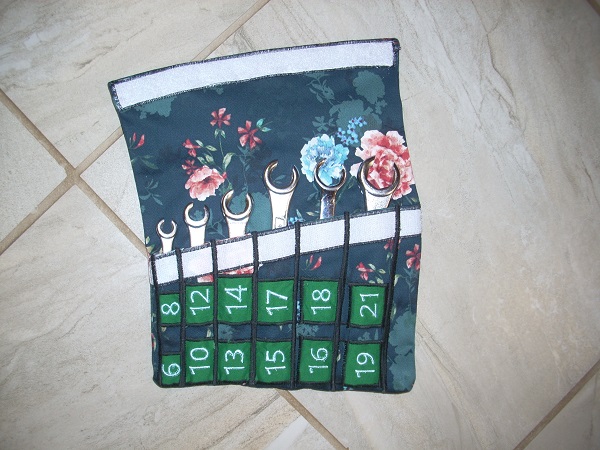
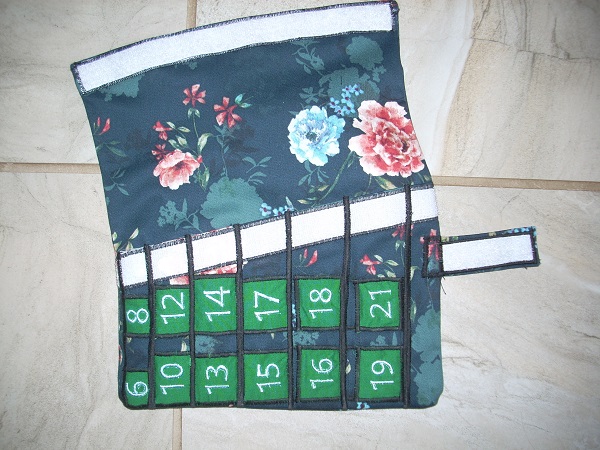
compact, easy to identify correct size, easy to get and put away, secure closure, beautiful.
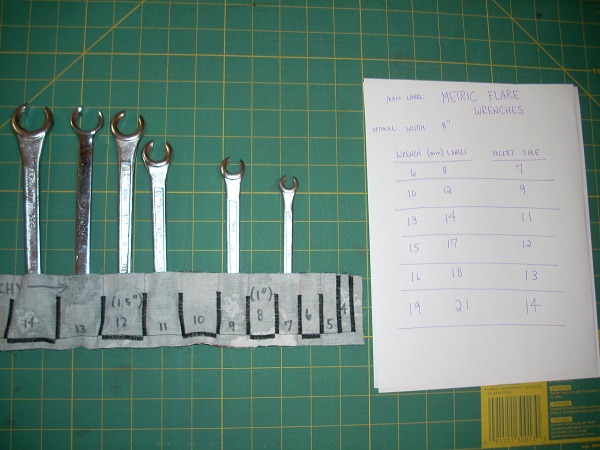
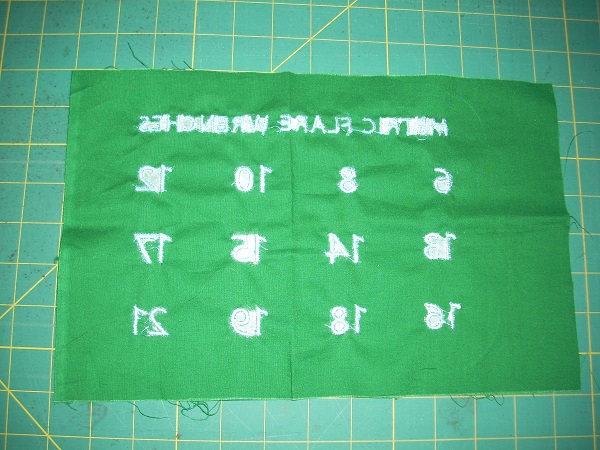
I'm making him four holders: SAE flare, SAE combination, metric flare, metric combination.


front of finished wrench organizer, showing:
slanting flap with velcro closure;
tab to secure roll;
wrench size labels

back of organizer, showing:
main label;
velcro for roll-up closure

slanting flap closed

roll up from left (smallest wrenches) to right

secure with velcro tab


POCKET WIDTH TEST STRIP:


Make a test strip to determine pocket widths;
note the stretchy direction of the fabric (if any);
go from $\,\frac 48''\,$ (0.5 in) up to about $\,\frac{20}8''\,$ (2.5 in)

Sew right-sides together, for better visibility of markings.

finished pocket width test strip:
6mm flare wrench (about 0.24 in) requires a $\,\frac 7{8} = 0.875\,$ inch pocket
19mm flare wrench (about 0.75 in) requires a $\,\frac{14}{8} = 1.75''\,$ inch pocket


Make a test strip to determine the correct width for each wrench pocket.

DETERMINE POCKET WIDTHS:

  • Use your test strip to determine the proper widths for each wrench.
    To maximize compactness, put the smallest side down (into the pocket).
  • Can't decide between two adjacent pocket sizes?
    Err on the big side: you can always put in an extra line of stitching to tighten up a pocket, but you can't easily make it bigger!
  • Record your work on a piece of paper (as shown).


EMBROIDER LABELS:


Sew all the labels at once.

Clip threads on right side.

Clip jump threads on back side.
Remove stabilizer.

Cut labels apart.
Embroidery machine hints:
  1. I use the ALIGN and DISTRIBUTE features of Embrilliance Essentials to evenly space the labels.
    This makes it easier to cut them apart after stitching.
  2. For best stitch quality, use the same color thread in top and bobbin.
  3. After sewing, clip threads on right side.
    Bent-handled embroidery scissors and sewing machine tweezers help tremendously!
  4. Clip only long jump threads on back side.
  5. Remove stabilizer.
    It is not necessary to get the tiny pieces of stabilizer from inside letters/numbers.
  6. Cut labels apart, leaving enough space around each to zigzag onto organizer.


MAKE ORGANIZER PATTERN:

DO THE FOLLOWING, IN ORDER:
  • Step 1:
    Draw a line for left edge of organizer (call it L1).
    The pattern will extend several inches to the left of this line—leave enough room!
  • Step 2:
    Draw a perpendicular line for bottom of organizer (call it L2).
    The point where L1 and L2 cross is the lower left corner of your organizer.
  • Step 3:
    Starting at the lower left corner, mark each pocket width (from your chart), from smallest to largest.
  • Step 4:
    Draw a line perpendicular to L2, at the right side of the last pocket. Call it L3.

Step 1: draw L1
Step 2: draw L2
Step 3: mark pocket widths
Step 4: draw L3


  • Step 5:
    Lay your wrenches in place, centered in each pocket, with bottoms even and near L2.
    Remember: small sides down!
  • Step 6:
    Draw a (slanted) line where you want the tops of the pockets (call it L4).
    You're actually just drawing parts of L4 that extend outside the wrenches—you'll draw the center after removing the wrenches.

Step 5: lay wrenches in place
Step 6: draw (part of) top-of-pocket line L4


  • Step 7:
    The pocket closure flap fold line is parallel to L4.
    It should ‘hug’ the tops of the wrenches:
    it should be very close, without touching any wrench.

    To check the parallel condition, make sure the red measurements shown are equal.

    Draw the fold line (call it L5).

    Then, remove the wrenches and complete line L4.

Step 7: draw fold line L5
(make sure red measurements are equal)


  • Step 8:
    Measure the perpendicular distance between L5 (fold line) and L4 (top-of-pocket line); call it $\,D\,.$

Step 8: let $\,D =\,$ perpendicular distance between fold and top-of-pocket lines


  • Step 9:
    Let $\,v\,$ be the width of the velcro to secure the flap.
    Let $\,s\,$ be the desired seam allowance.
    (for me: $\,v = 1\,,$ $\,s = 0.5\,$)

Step 9: measure velcro width ($\,v\,$);
decide on desired seam allowance ($\,s\,$)


  • Step 10:
    Let $\,I\,$ (the red dot) denote the intersection of L3 and L5 (fold line).

    Draw a line through $\,I\,$ perpendicular to L5; call it L6.
    L6 marks the right (finished) edge of the closure flap.

    Mark distances along L6, from $\,I\,$:
    • UP $\,D\,,$ then $\,v\,,$ then $\,s\,$
    • DOWN $\,D\,,$ then $\,v\,$

Step 10: flap measurements


  • Step 11:
    Draw the red segment.
    It marks the right edge of the wrench holder, from bottom of velcro to bottom of holder.

    Note that there is some extra fabric (shown in green, between L3 and the red segment) that lies to the right of the biggest pocket. This prevents the flap from poking out when it's folded down.

Step 11: draw red segment


  • Step 12:
    Draw the red segment, from L4 (top-of-pocket) to top of holder.

    When the flap is folded down, there will be a tiny triangle (shown in green) where the bottom fabric shows through. Don't worry about this! It's not worth the effort to adjust for it.

Step 12: draw red segment


  • Step 13:
    Draw a distance $\,s\,$ around the entire perimeter (shown in pink).
    This is your fabric cut line!

    The entire pattern is shown here, with some extraneous markings removed (for simplicity).

Step 13: draw fabric cut line


CUT FABRIC:

  • fabric right sides out; pin pattern to fabric
  • Remember: fabric should stretch (if any) in direction organizer will be rolled (left/right)
  • all edges are straight; use rotary cutter and straightedge
  • you get two main pieces

cut two main pieces

two main pieces


Top Pocket:

The top pocket has a finished edge:
you'll fold over $\,s\,,$ and then $\,s\,$ again.

Make sure the fabric stretch (if any)
goes left-to-right.

Follow steps 1–3 at right.

Label the pieces on the backs as shown below; this may prevent future errors!


(1) mark $\,2s\,$ up from top-of-pocket

(2) cut along just-drawn line

(3) pin to SINGLE thickness of fabric; cut

all fabric pieces


ZIGZAG LABELS TO ORGANIZER:

For all labels, straight-stitch first to check position.
(It's much easier to remove a straight stitch than a dense zigzag!)

Or, use this fabric glue stick to secure the labels before zigzagging.

Then, zigzag with a wide, dense stitch.
(On the Janome 9400 QCP, I use width 4.0 and density 0.4.)

Main Label:
  • place on LEFT side of BACK piece;
    this way, it's guaranteed to show when holder is rolled up from left to right
  • place it far enough in so it won't be caught in seam allowance
Pocket Labels:
  • Stitches to help position pocket labels:
    • If you want to preserve your main pattern, make a photocopy to use for these steps!
    • On your pattern, draw the vertical pocket separators (shown in pink in A).
    • Place the pattern on the pocket fabric and stitch (through both paper and fabric) along the red lines shown in (B). These stitches will be covered in later steps—they're only used for positioning.
    • Remove and discard the paper.
      (Hard to remove paper close to the stitches? Scrape your fingernail over it and rub!)
  • Make sure the pocket labels do NOT overlap the velcro!
  • Sew on ALL sides of labels, even those that will be covered by future pocket separating stitches.
    (A single zigzag isn't sufficient to securely cover both sides of adjacent labels.)

(A) stitches to help position pocket labels

(B) stitch along the red lines

zigzag labels in place


SEWING ON VELCRO:

Straight-stitch first, to position.
Then, I zigzag with width 3.0 and density 0.5 (on the Janome 9400 QCP).

SEW VELCRO ON BACK:

Sew a piece of velcro (hard side) on back, as shown.
This velcro is used to hold the organizer together when rolled.

stitch velcro (hard side) on back


FINISH TOP EDGE OF POCKET:

To completely hide the rough edge and make a sturdy pocket top:
  • fold down $\,s\,$ and single-stitch to hold in place
  • fold over $\,s\,$ again and single-stitch near edge
Since the seam allowance ($\,s\,$) is less than the velcro width,
these stitches will be covered by velcro in the next step.

finish top edge of pocket


ATTACH VELCRO TO POCKET TOP:

Attach velcro (hard side) to the pocket top finished edge.

stitch velcro (hard side) on top of pocket


ATTACH POCKET TO FRONT OF MAIN ORGANIZER:

Baste the pocket in place on the front of the organizer:
single-stitch the bottom and both sides (but NOT the top),
stitching very close to the edge.

baste pocket (sides, bottom) to front of organizer


SEW POCKET SEPARATORS:

Using the previously-stitched pocket separator guidelines,
zigzag the vertical pocket separator lines.

Be sure to use the same stitch width as used on your test pocket.
(For me: width 4.0, density 0.4)

Stitch from bottom to top, sewing over the velcro.
Re-stitch, as needed, to get good coverage.

Check wrenches in pockets.
If too loose, add another row of zigzagging on one or both sides to tighten up the fit.

sew vertical pocket separators;
check wrenches in pockets and adjust if needed


SEW RIGHT SIDES TOGETHER:

Sew right sides together along bottom and side edges (NOT the top).
Use a slightly shorter straight stitch for extra strength (density 1.8).

Slightly round out the angles; pivot at corners.

Stitch again, close to the first stitching, for strength.

Clip corners.

Turn inside out and press.

sew right sides together;
clip corners, turn, press


FINISH TOP EDGE, ATTACH VELCRO:

Turn $\,s\,$ to the inside (on both separate top sections) on top edge and stitch, to hide raw edge.
Stitch again, through both layers, to close the top.

Attach velcro to top front (soft side), as shown.

finish top edge;
attach velcro


TAB FOR SECURING ROLL:

Cut a 4" by 3" rectangle of fabric.

Press down ⅜" on opposite long edges.
Then, press down ⅜" on the remaining opposite edges.

Fold (along the long side) in half, right sides out, and press.
Stitch very close to the edge on the three unfolded sides;
this encloses all raw edges.

Sew velcro (soft) to one side:
leave about ⅜" exposed at one end to attach to organizer.

Zigzag tab to the back side of organizer,
with velcro facing towards front.
Make sure it lines up with the strip of velcro on back.

tab for securing roll: view from back

tab for securing roll: view from front