After learning how to make
fabric from scraps, I started thinking about what I could do with this gorgeous homemade fabric!
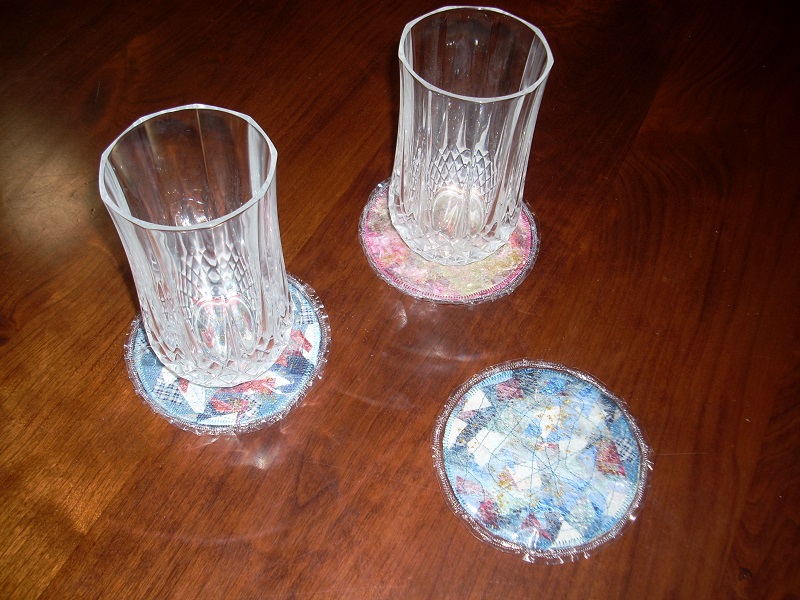
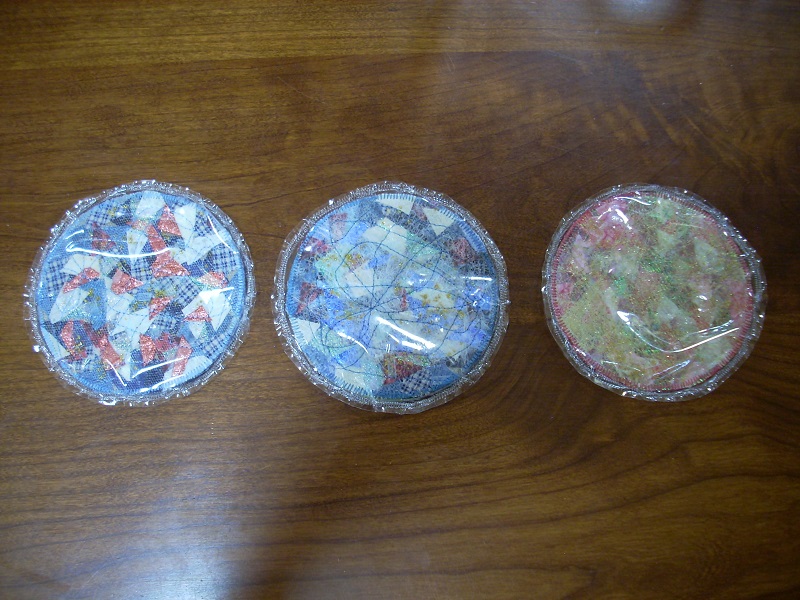
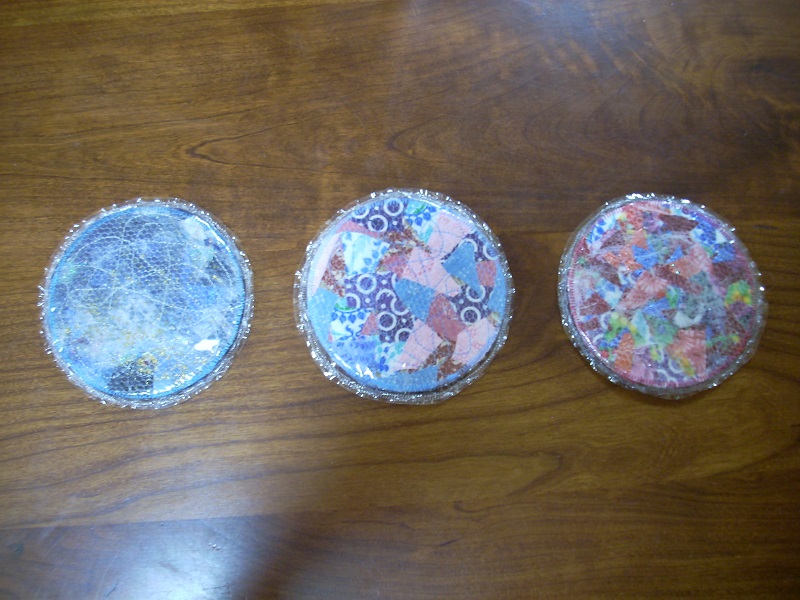
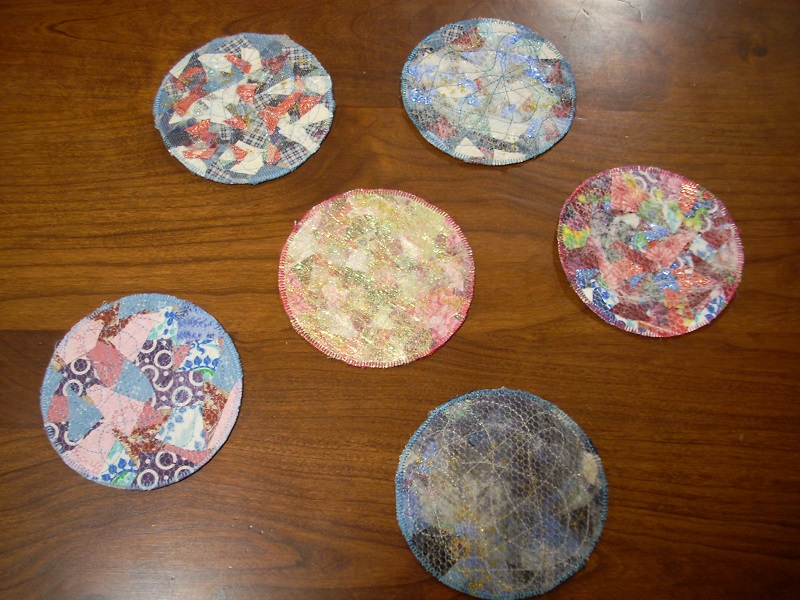
These coasters are double-sided and encased in plastic. If they get spilled on, just rinse them off. They add character to a simple table setting, and
are so much fun to make.

(1) CUT CIRCULAR BASES FROM CARDBOARD:
-
Thin cardboard (like from a cereal box) works great. You'll be sewing through it, so you don't want the cardboard too thick.
-
I use my ScanNCut to cut perfect circles
(I have the older CM100 model).
My ScanNCut cuts a maximum thickness of about 1.5 mm, which is another reason I don't want the cardboard too thick.
-
Settings for ScanNCut CM100: Pattern–Shapes–BA-A045, Height and Width both 3.94"
Deep-cut blade, set at 6
I put small pieces of tape on all four sides of my cardboard on the cutting mat—my mat is old, and the stickiness isn't as good as when it was new.
|
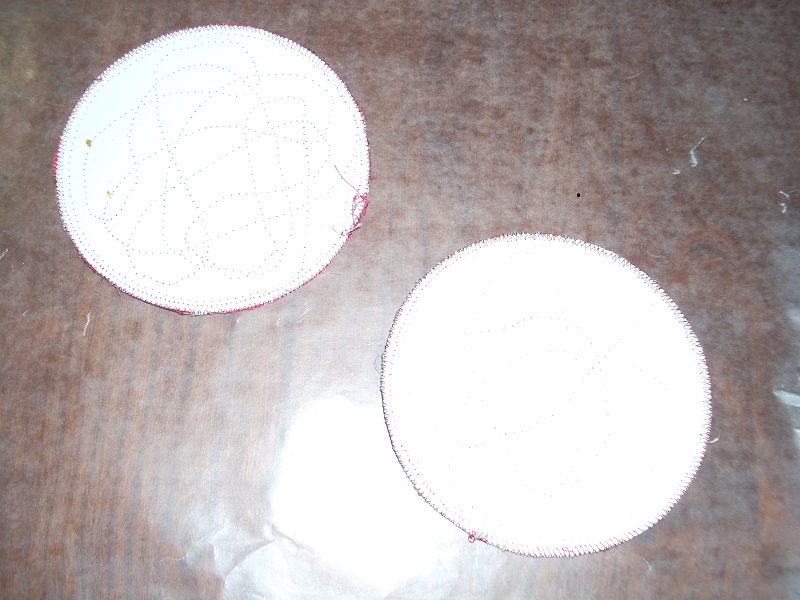
(2) CREATE A FABRIC COLLAGE ON EACH CARDBOARD DISK:
-
Using your cardboard disks as bases, create a scrap fabric collage on each disk
using this tutorial.
-
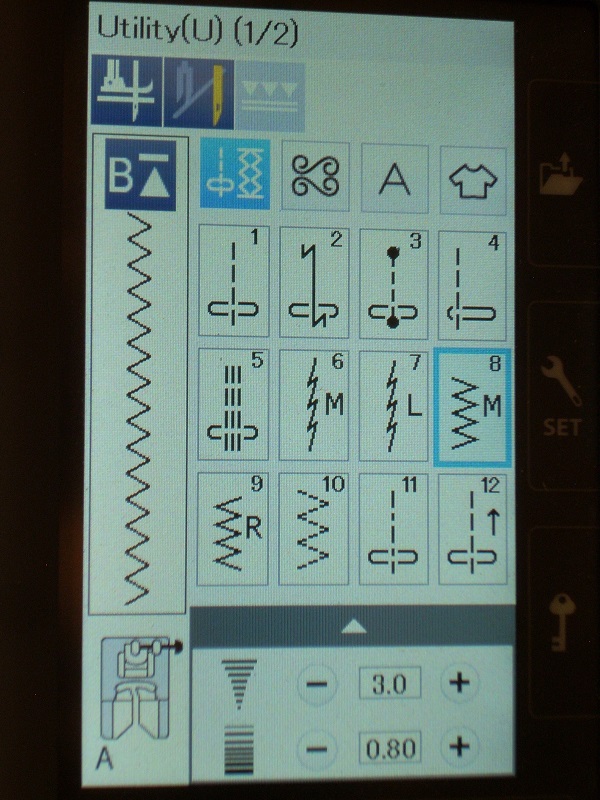
When finished, zig-zag around the perimeter of each disk using a dense stitch.
[Janome 9400 QCP: Utility stitch 8, stitch density 0.8]
|
(3) GLUE, TO MAKE THE DISKS 2-SIDED:
-
Protect your surface with (say) waxed paper or parchment paper.
-
Make the disks two-sided by gluing sets of two together—I use
Elmer's multi-purpose glue. Align the disks carefully!
(There's glue on the back of the right disk above—it's just hard to capture white glue on a white disk.)
-
Some glue may ooze through the holes made by the sewing machine quilting—no problem! Just lightly wipe it off. When it dries, it won't show at all.
- Place another piece of protective paper over the glued disks, and stack some heavy books on top. Let dry completely.
|
(4) CUT PLASTIC FOR DISK CASING:
- I buy plastic-by-the-yard at Walmart, in the fabric section [December 2018, $1.47/yard, 54" wide].
-
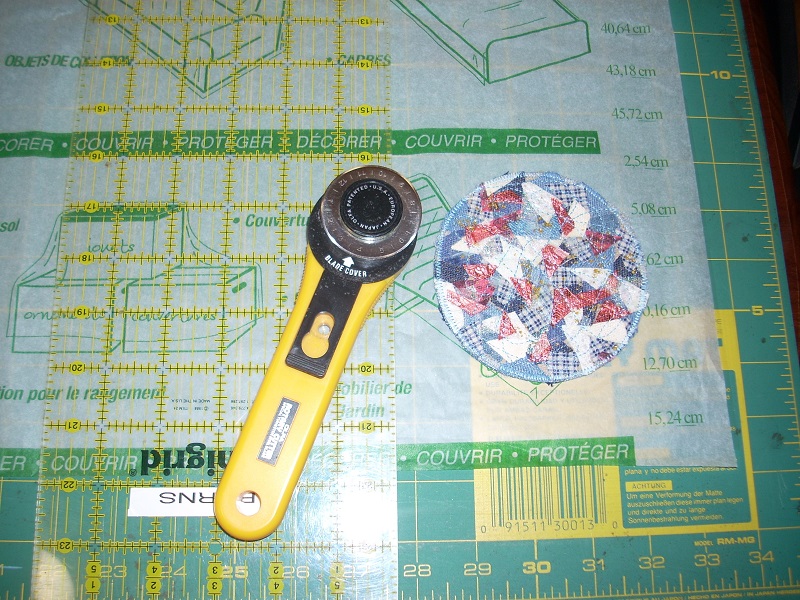
Using a cutting mat,
rotary cutter,
and
quilting ruler,
cut squares of plastic with side length about 2" longer than the disk diameter. You need two squares for each coaster.
-
For my size coasters, I cut 6" squares. This is particularly easy with this
quilting ruler, since
its width is 6". Just line up the ruler with the edges of the plastic and cut!
-
In this photo, I've left the paper on the plastic just so you can ‘see’ the plastic. I actually remove the
paper before cutting the plastic.
|
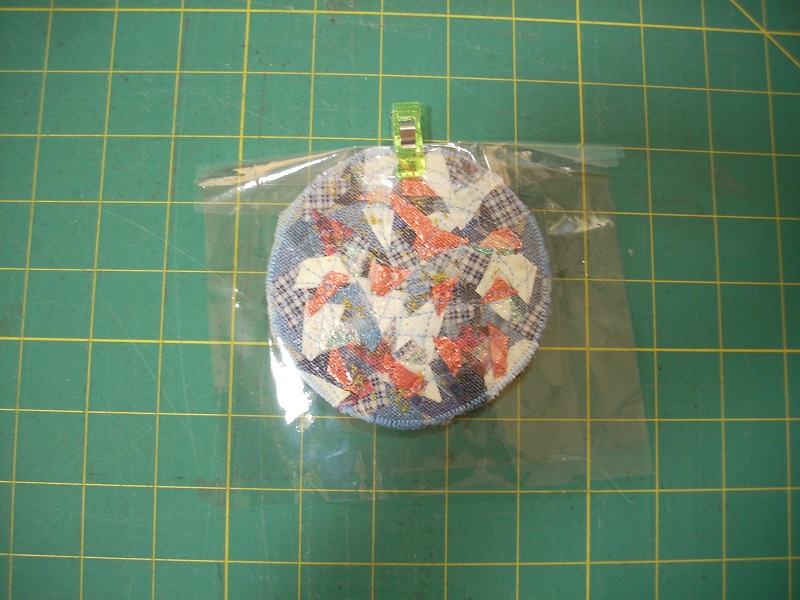
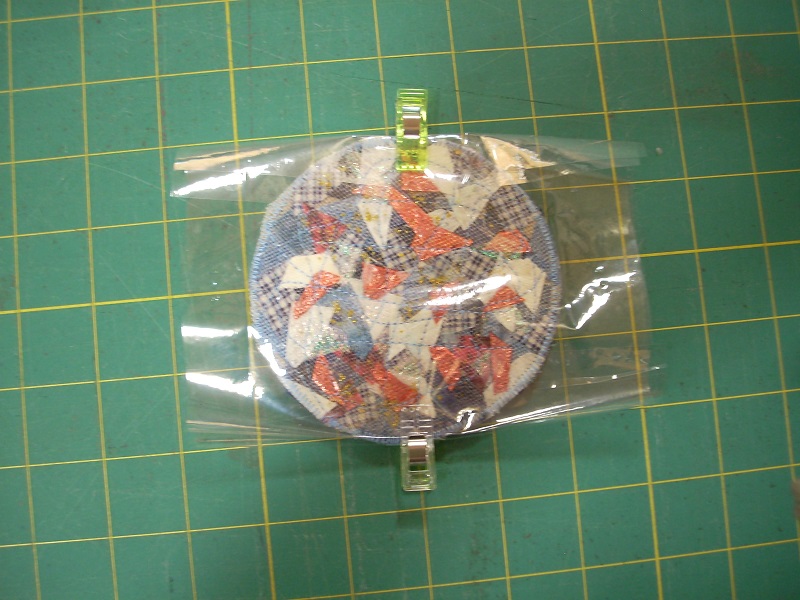
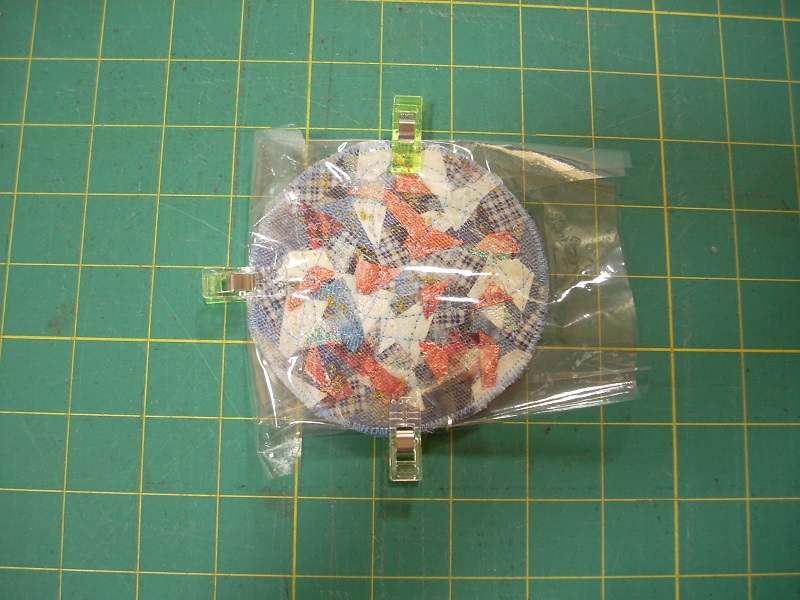
(5) ENCASE THE FABRIC DISK IN PLASTIC:
-
Wonder clips are essential to get a wrinkle-free result!
- Place your coaster between two plastic squares, centering in all directions.
- Fold down the top, right up against the coaster, and clip (a).
- Fold up the bottom, right up against the coaster, and clip (b).
- Fold the left side over and clip (c).
|
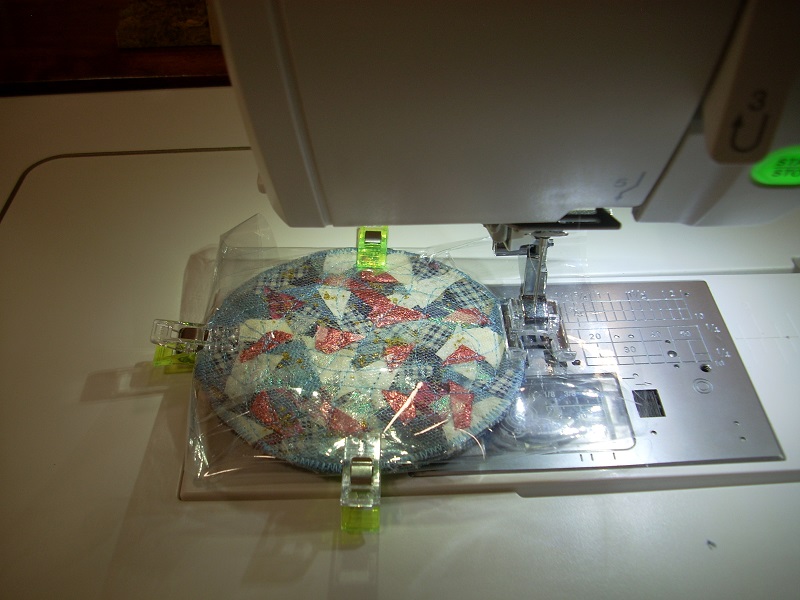
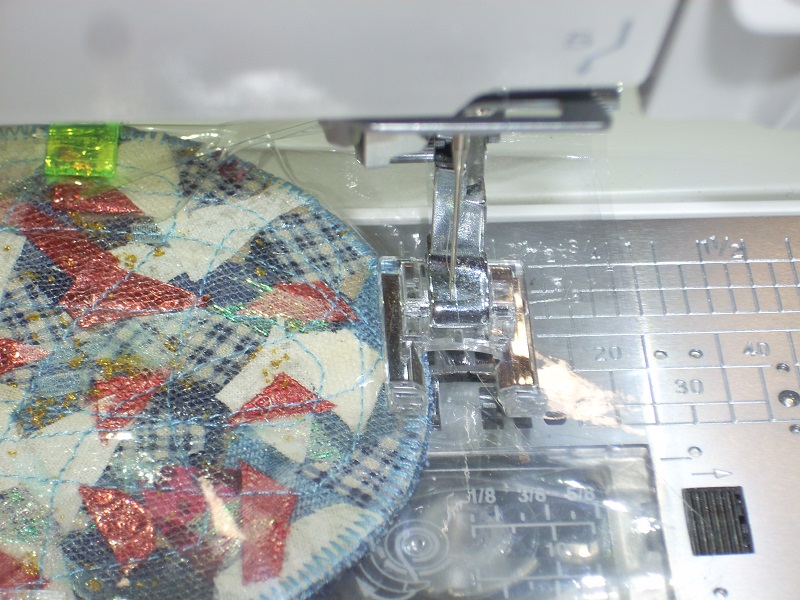
(6) MACHINE-ZIGZAG AROUND THE PLASTIC DISK:
The sewing you'll do here—with one side of the presser foot UP on the cardboard, is likely going to seem very strange to you!
But, it works great!
-
Use the Janome F2 open-toe satin stitching foot (or a similar foot for your machine).
- Use invisible thread.
-
Position the disk in the machine as shown (a). Note that the right edge of the left side of the presser foot is
riding along the very edge of the disk (b).
- Janome 9400 QCP stitch settings: Utility stitch #8, density 0.8 (c)
- Stitch slowly, removing the wonder clips as you go. At the end, slightly overlap your starting position, and lock-stitch.
|
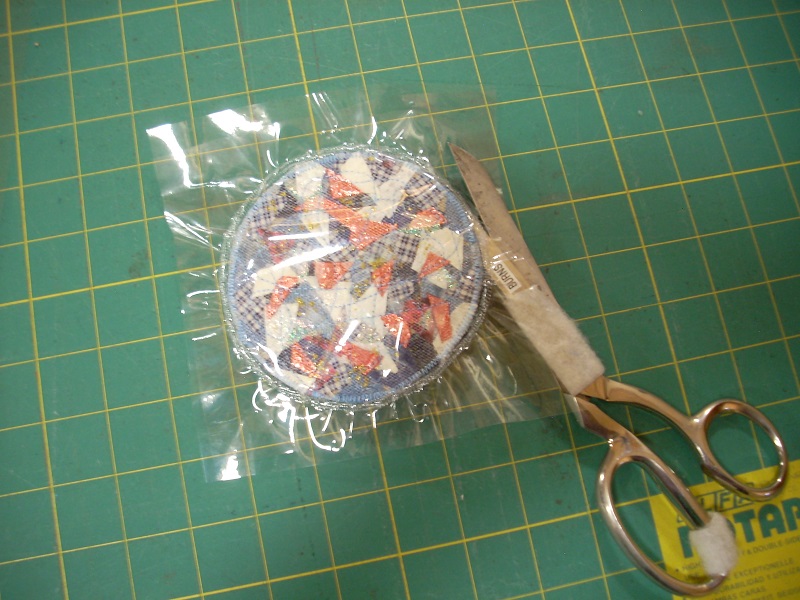
(7) TRIM CLOSE TO STITCHING:
Trim the coaster close to the stitching, but be very careful not to cut the stitching.
|