This tutorial firms up many of the concepts introduced in
GeoGebra Worksheet: Triangles,
and also introduces some new features of
GeoGebra.
This tutorial will be most helpful if you're trying everything in GeoGebra while you're reading.
Here's one way to do this:
- go to the GeoGebra download page (this link opens in a new tab or window)
- click on APPLET START; this gives you a fully-functioning GeoGebra window, but doesn't install anything on your computer
Note: Things tend to change a bit over time.
Some of the information in this lesson may look slightly different on your own version of GeoGebra.
However, everything should be similar enough for you to recognize what to do.
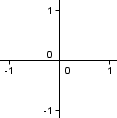
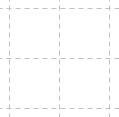
In the View submenu, a checked item means that it is visible.
These work as a toggle; when you click on a checked item, it becomes unchecked.
When you click on an unchecked item, it becomes checked.
Here are some examples:

|

|


|


|
| Axes visible; no Grid | Grid visible; no Axes | Axes visible; Grid visible | no Axes; no Grid |
To get a drop-down menu from the toolbar, you must click the small arrow in the bottom right
corner of a tool.
If you click anywhere else, you'll just make the tool active instead of getting the submenu.

To rename an object, right-click on the object and select ‘Rename’.
GeoGebra won't allow two different objects to have the same name:
it automatically renames, if needed, to prevent this from happening.
Free objects are ones that can be freely moved with the MOVE tool.
Dependent objects depend on something else.
Here's a simple example to illustrate the difference.
To set things up:
- use the POINT tool to create two points, [beautiful math coming... please be patient] $\,A\,$ and $\,B\,$
- in the POINT drop-down menu, select ‘Midpoint or Center’
- click on $\,A\,,$ then click on $\,B\,$; the midpoint will appear, which GeoGebra automatically labels $\,C\,$
- rename $\,C\,$ as MIDPOINT (see instructions above)
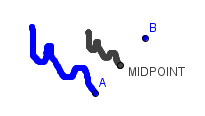
You should now see what appears below: points
[beautiful math coming... please be patient]
$\,A\,$ and $\,B\,$ are free; MIDPOINT was constructed
as the midpoint of $\,A\,$ and $\,B\,.$
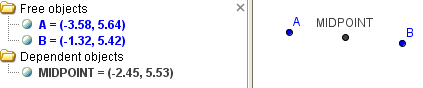
With the MOVE tool, you can move [beautiful math coming... please be patient] $\,A\,$ and $\,B\,$ wherever you please. (Try it!)
If you try to move MIDPOINT, it won't budge. The only way to control MIDPOINT is through its ‘parents’ $\,A\,$ and $\,B\,.$
(By the way, MIDPOINT is often called a ‘child’ of $\,A\,$ and $\,B\,.$ )
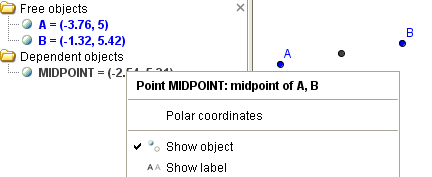
If you hover over a dependent object, then you can see its dependency:

If you right-click on an object and check ‘Trace On’,
then you can see a ‘trace’ of its
movement in the geometry window.
Below, both
[beautiful math coming... please be patient]
$\,A\,$ and MIDPOINT are being traced.
(Point $\,A\,$ was moved with the MOVE tool; MIDPOINT followed accordingly.)
To make a trace disappear, uncheck ‘Trace on’.
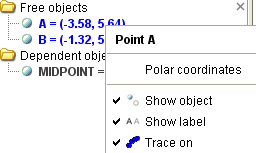
Right-click on an object and uncheck ‘Show Object’ to make it disappear; its label also disappears.
Such an object is called a hidden object.
Notice that the bullet next to a hidden object is hollow; the bullet next to a visible object is filled-in (solid).
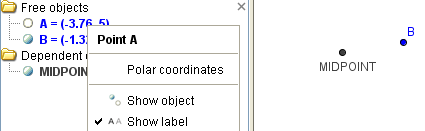
If desired, you can uncheck ‘Show Label’ to make only a label disappear:
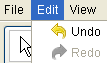
GeoGebra has a wonderful ‘undo’ feature.
If you ever goof anything up, just select Edit-Undo from the menu.
(There might also be an undo/redo shortcut at the right of the toolbar.)
You can undo multiple items.
You can redo anything that you undo.
The easiest way to get a new GeoGebra window is to select File-New .
You are given the option of saving the current file.
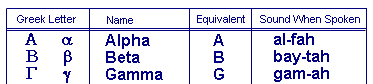
GeoGebra uses lowercase Greek letters to label angles.
For now, you should know the first three lowercase Greek letters: alpha ($\,\alpha\,$), beta ($\,\beta\,$), and gamma ($\,\gamma\,$).
Sometimes, labels get positioned in an ugly way.
You can use the MOVE tool to adjust the position of the labels.

|

|
| ugly labeling | better labeling |
You can display text in the Geometry Window using the ‘Insert Text’ tool, which is in
the drop-down menu of the SLIDER tool.

After you select a tool, instructions on its proper use appear to the right of the toolbar:

Always look in this space to see how to use a tool!
For the ‘Insert Text’ tool, click anywhere in the drawing pad, and a text box appears:
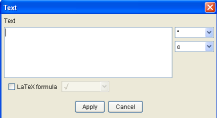
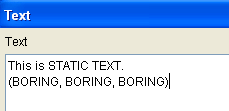
Static text is text that just sits there—it is static—it doesn't change.
Just type static text in the text box and click the button to accept.
Use the MOVE tool to put the text where you want it.
Dynamic text is text that changes.
It's much more exciting and useful!
Quotation marks (",") are very important when you're creating dynamic text.
Characters inside quotation marks are displayed exactly as they appear.
Outside the quotation marks, a ‘+’ sign is used to put things together.
When you type a GeoGebra object outside the quotation marks, its current value will be displayed.
Try to duplicate each of the examples below:
In this first example, create a single point,
[beautiful math coming... please be patient]
$\,A\,.$
In the ‘Insert Text’ box, type: "A =" + A
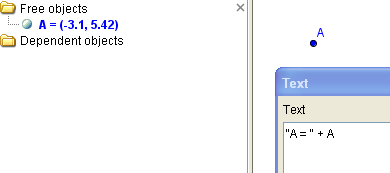 Type "A =" + A in the text box ... |
 As you move $\,A\,$ around, the coordinates will change. |
In this second example, create a line segment from
[beautiful math coming... please be patient]
$\,A\,$ to $\,B\,.$
Follow the directions illustrated below:
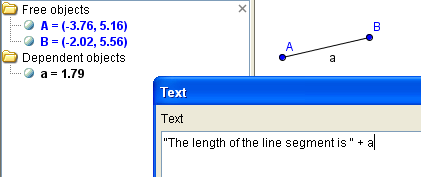 Type this in the text box ... |
 Move either endpoint and watch the length change! |
In this third example, use the CIRCLE tool to create a circle with center
[beautiful math coming... please be patient]
$\,A\,$ and equation $\,c\,.$
Then, follow the directions illustrated below:
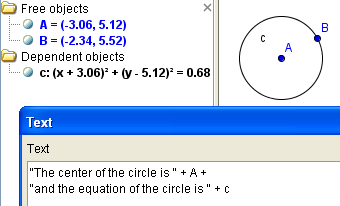 Type this in the text box ... |
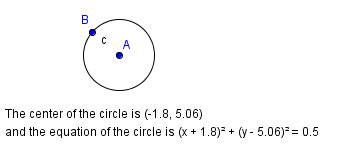 Move $\,A\,$ or $\,B\,$ and watch the dynamic text change! |
You can change the properties of displayed text by right-clicking on the text box and selecting ‘Properties ...’ .
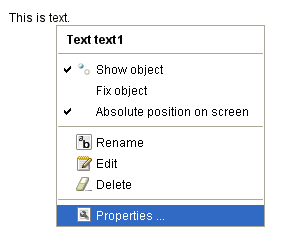
You see the changes immediately in the Geometry Window.
Two of the tabs, however, deserve some discussion: ‘Position’ and ‘Advanced’.
You can set up text to follow (say) a point around the screen.
Get the ‘Properties ...’ box for the desired text.
Click on the ‘Position’ tab.
Type the name of the point you want the text to follow in the ‘Starting Point’ box:
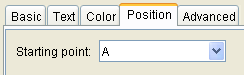 Set up your text to follow point [beautiful math coming... please be patient] $\,A\,$ ... |
 ... and as you move $\,A\,,$ the text follows! |
GeoGebra uses x(A) and y(A) to denote the $\,x$-value and $\,y$-value of a point $\,A\,.$
Suppose you only want to show an object (like text) when a certain condition is met.
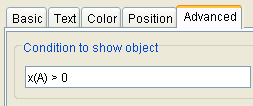
You can use the ‘Advanced’ tab of the ‘Properties...’ box to do this!
For example, suppose you only want to show text when the
[beautiful math coming... please be patient]
$\,x$-value of a point is greater than zero.
Get the ‘Properties ...’ box for the desired text.
Click on the ‘Advanced’ tab.
Follow the instructions below:
|
|
|
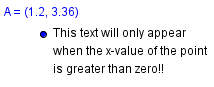
| Set up the desired condition. | Here, the
[beautiful math coming... please be patient]
$\,x$-value is $\,1.2\,,$ which is greater than zero. Thus, the text is showing. |
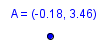
Here, the $\,x$-value is $\,-0.18\,,$ which is not greater than zero. Thus, the text is not showing. |
Indeed, every GeoGebra object has its own ‘Properties ...’ box.
This ‘Properties ...’ box gives you some special labeling features:
you can show only the NAME of an object; both the NAME and VALUE; or only the VALUE.
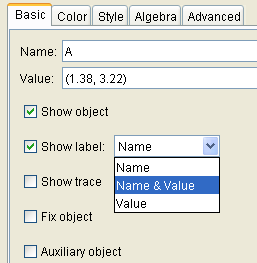 set up point [beautiful math coming... please be patient] $\,A\,$ to show both name and value ... |
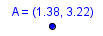 ... and here's what you'll see |
by practicing the exercise at the bottom of this page.
When you're done practicing, move on to:
Introduction to Polygons